

21 Tips for Conducting a Captivating Video Interview

BTS Photo from a short film featuring Kim Coates - Photo by Bob Deutscher
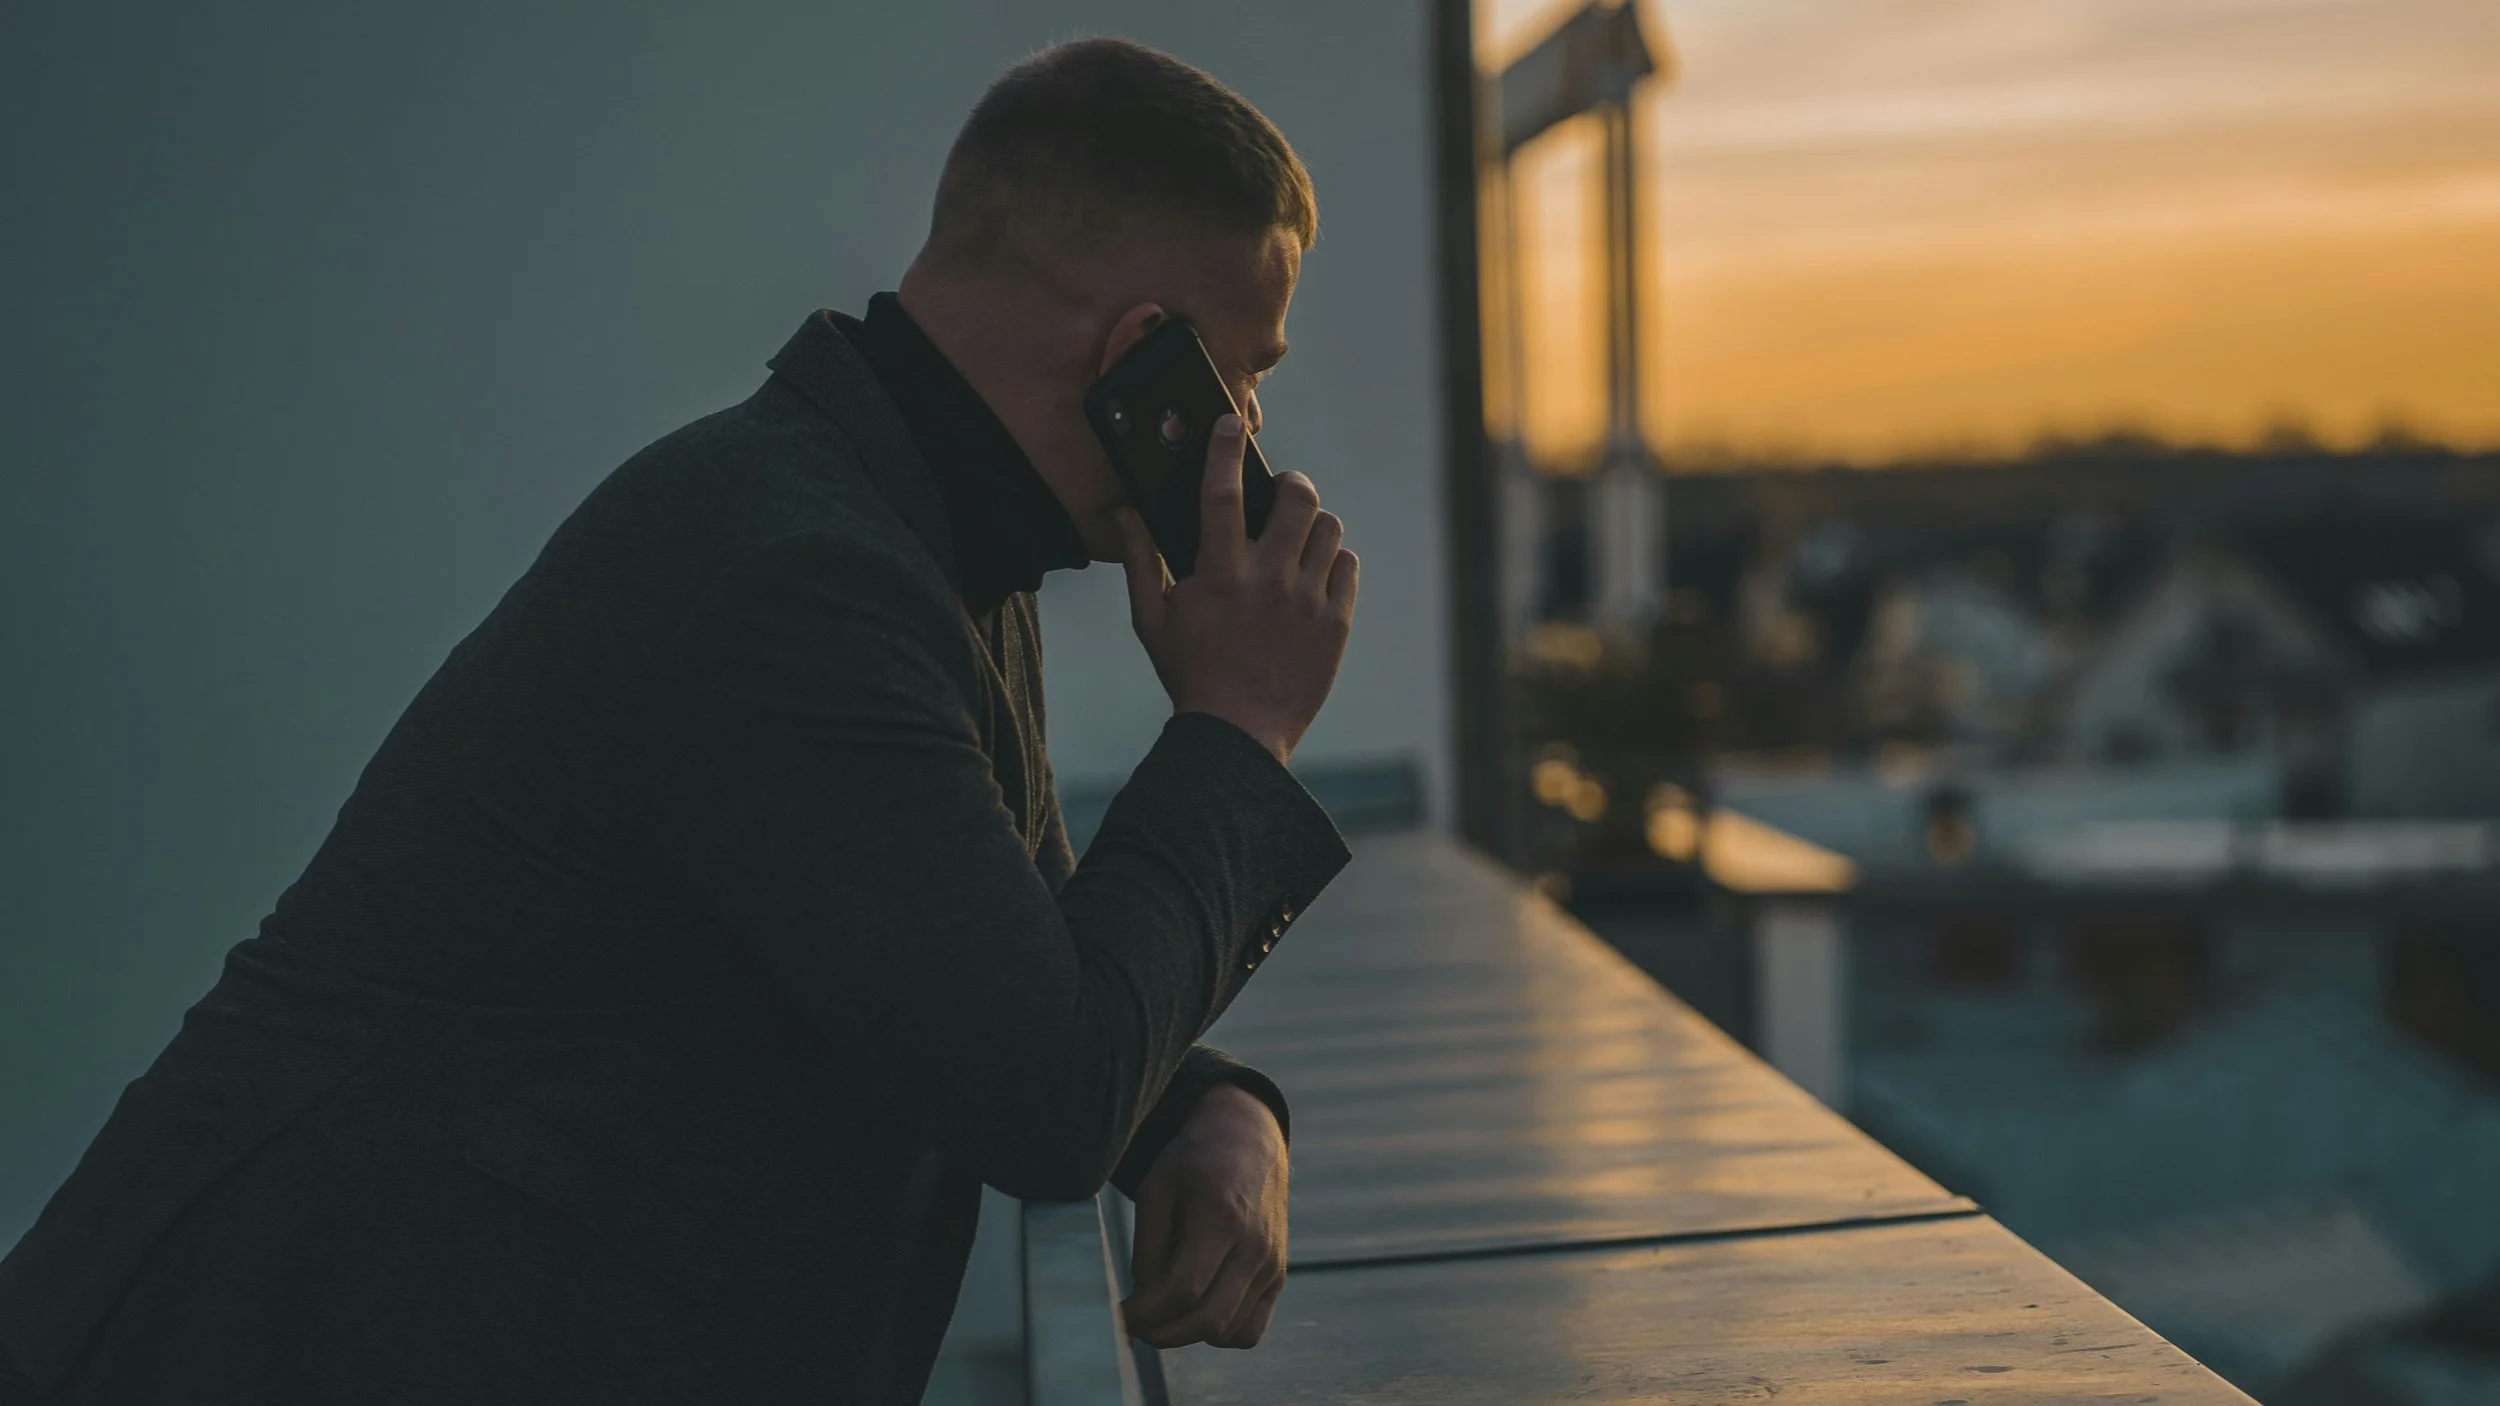
When it comes to documentary filmmaking, interviewing skills are one of the most important aspects to master. These skills directly influence the depth, authenticity, and emotional impact of your film.
For me, this is the part of the process I enjoy the most because of the opportunity to learn something new about someone else. Over time, through conducting hundreds of interviews, I’ve discovered a few techniques that help build trust and ensure you get the best content from the person you are interviewing.
Here are the 21 Tips for Conducting a Captivating Video Interview:
Start with In-Depth Research.
Conduct a Pre-Interview to Build Rapport.
Breakdown Your Pre-Interview.
Ensure the Interviewee has a clear understanding of what to expect from the filming experience. Involve them in the process.
Prepare Open-Ended, Probing Questions.
Conduct a Pre-Interview Visual Tour.
Create a Relaxed, Distraction-Free Environment.
Start with Casual Conversation First - “The Warm-Up”.
Start the Interview with Emotionally Safe Questions.
Follow the Natural Flow of Conversation. Active Listening and Probing for Depth.
Explore Contrasts in the Interview.
Use Nonverbal Affirmation & Mirror Body Language.
Utilize Silence.
Echo and Reframing Technique.
Ask the Same Question Twice.
The Delayed Cut.
Open up Questions to Your Crew and then Subject.
Get the Ending Again if Needed.
Leverage Verité Sound-Ups.
Use a “Walk-and-Talk” Interview.
Do Not Ask for the Interviewee to Repeat the Question in Their Answer.
Tip #1: Start with In-Depth Research
It is important to spend time researching the person you are going to talk to prior to meeting. Whether for a video interview or just a meeting, it shows respect and also shows you are prepared and not wasting someones time. As I have grown with my business, this has been one aspect I have really leaned on in any interaction.

Research helps as it does the following:
Research Helps to Inform Your Questions: Research helps you craft informed and insightful questions. Instead of generic questions that you probe on the day, you can tailor your questions based on the information you get during this call. It helps you dive deeper into areas that interest you and your topic or areas that clearly light up your subject.
Shows Respect and Credibility: When an interviewer demonstrates knowledge in the area of discussion, it shows respect for the interviewee and their story. It also helps when talking about complex issues that may benefit from this research.
Helps Guide the Conversation: Understanding the background of your subject allows you to steer the conversation effectively. You can avoid irrelevant topics and instead focus on what matters most to your subject. You can then lead with more engaging and meaningful discussion.
Allows for Deeper Probing: With thorough research, you can ask more complex follow-up questions or probe deeper into a subject’s motivations, decisions, or emotions. This often results in more compelling, authentic responses rather than surface-level answers.
Avoids Redundancy: Interviewees may have answered certain questions repeatedly in previous interviews or public appearances. Research helps you avoid asking redundant questions, allowing you to explore fresh angles and uncover new information. This point is one of the ones easily overlooked.
Uncovers Unexplored Angles: Research may reveal lesser-known facts, controversies, or emotional stories about the interviewee. Armed with this knowledge, you can explore unique angles and narratives that might otherwise go unnoticed. One great example of someone who does this well is Sean Evans from Hot Ones. In almost every interview, Sean and his team lean into the lesser known aspects of guests that require a deeper level of research in order to reveal these new angles for the interviews.
Prepares for Potential Challenges: If the interview touches on sensitive or controversial topics, research prepares you to navigate these issues with tact. It also helps you anticipate difficult or evasive responses and equips you with the knowledge to handle such situations effectively.
Boosts Confidence and Control: Going into an interview well-prepared makes you feel more confident. You’ll have a clearer sense of direction and will be better equipped to adapt to the flow of conversation, leading to a more controlled and productive interview.
Supports the Overall Narrative: In documentary filmmaking, research not only helps structure the interview but also contributes to the overarching narrative. By understanding the subject’s role or story within the larger context, you can ask questions that align with and strengthen the film’s themes. You will know what angles to explore prior to conducting the interview.
Tip #2: Conduct a Pre-Interview to Build Rapport.
Pre-Interviews are by far the most important part of the process if you are able to properly leverage the full value of these pre-interviews. This sets a foundation for a more comfortable and engaging interview.
Here is why your pre-interview is important:
Builds Rapport and Trust: A pre-interview helps establish a personal connection between the interviewer and the subject. This rapport creates a safe, comfortable space for the interviewee, encouraging them to open up and share more authentically when the camera is rolling. This is also a great space to learn what topics are fair game and which topics are off-limits.
Uncovers Key Themes and Stories: Pre-interviews provide an opportunity to explore the interviewee’s background, stories, and experiences in a more casual setting. This allows the interviewer to identify compelling narratives, emotional moments, or significant details that can be highlighted during the filmed interview.
Helps Plan and Structure the Interview: By understanding the subject’s perspective and experiences during the pre-interview, the interviewer can tailor the questions for the formal interview, ensuring that important topics are covered in depth. It allows for more focused and strategic questioning.
Reduces On-Camera Nervousness: If an interviewee is nervous or unsure, the pre-interview helps them become familiar with the interviewer and the process. This reduces anxiety during the actual filming, leading to more relaxed, natural, and authentic on-camera responses.
Reveals Unanticipated Insights: Pre-interviews often bring up unexpected stories or themes that the interviewer might not have anticipated. These insights can lead to new angles or lines of questioning during the filmed interview, making the final footage richer and more layered.
Saves Time During Filming: Pre-interviews streamline the filming process by allowing the interviewer to focus on the most relevant or emotional aspects of the subject’s story. This preparation reduces the likelihood of needing long takes or follow-up interviews, saving time and effort during production.
Ensures Better Storytelling: Understanding the interviewee’s voice, personality, and experiences ahead of time helps the filmmaker frame the interview in a way that supports the overall narrative of the documentary. It allows the filmmaker to connect the subject’s story to the broader themes and messages of the film.
Here is how to conduct your pre-interview:
Schedule a pre-interview via video call. Although it does ask more from the person you are interviewing, a video interview is great way to start to establish a connection. The subtle cues you will pickup when you see them versus hear them makes this an added bonus that I tend to lean into when possible.
Record your call. Make sure to record your call so you can reference this pre-interview when prepping for the actual interview. Ensure that you let the person you are talking to know you are recording the call. To record the call, I tend to use the voice memos on my phone. You can also use a separate recorder if needed.
Take notes. Additionally, when you are on the call, take a few notes for things that stand out to you in the moment. These notes can either be aspects you want to follow up on or answers that stand out in the moment - be it visual cues of excitement or anything like that. Your transcripts won’t pick up on these cues so it is nice to be able to reference later.
Tip #3: Breakdown your Pre-Interview.
I remember a project I worked on in the past where the production team conducted a pre-interview for a project but didn’t use the pre-interview to dictate the approach to the interview when it was conducted. They simply conducted the interview and left it at that.

It is one thing to do them to say you’ve done them but another to understand how to leverage the information. Here is how you can record and then breakdown your pre-interview to maximize the content.
Here is how to break down your pre-interview:
1. Transcribe the Pre-Interview Recording and Review Your Notes.
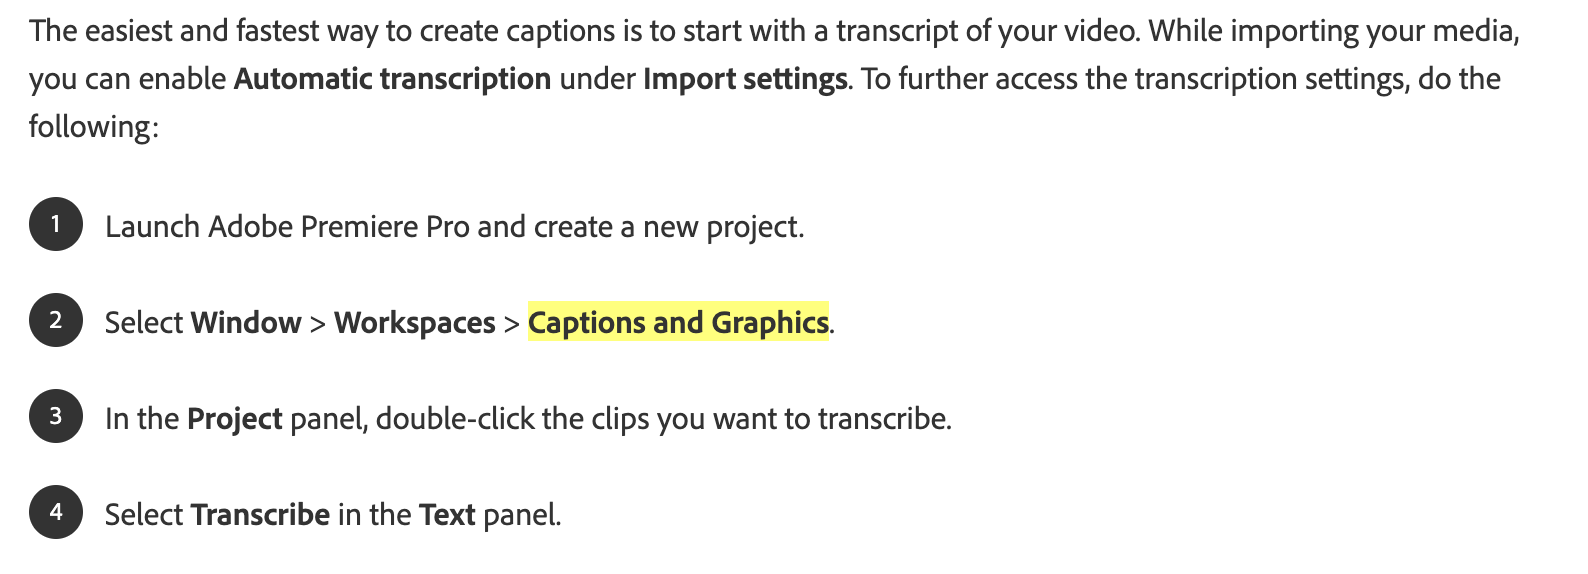
If using Adobe Premiere, here is how to transcribe your interview.
If using Davinci Resolve, here is how to transcribe your interview.

If you don’t use either, you can prepare an export for Youtube and Youtube will transcribe this for you. You can find the auto transcription in the description field labeled, show transcript. If you want to pay a service, there are many that exist as well.

2. Print Your Transcripts. Paper copies of the transcripts are helpful for me at this stage as I like to highlight key sections and then cut out sections to re-arrange and organize.
3. Upload Transcript to ChatGPT: A new step I have implemented is uploading the transcript into ChatGPT. Make sure you are very specific with your query prior to inputting your transcript. For me, I tend to specifically ask for ChatGPT to identify the most captivating lines from the transcript that clearly outline the subjects unique perspectives. I tend to limit this query to the top five ideas. From these lines identified, I will then mark these key lines on the paper copy. I will use this as a first step in identifying key lines.
3. Identify Key Themes and Topics. Once I have the initial pass done using ChatGPT, I will then go through the transcripts to highlight the major themes. I will also look back at any notes made during the pre-interview in case there things that stood out.
I will look for recurring ideas, stories, or emotions that the interviewee brought up. These are usually the core of their story and can guide the focus of the filmed interview. Next, look for any unique or unexpected details. Sometimes the pre-interview reveals unexpected stories or perspectives. Highlight anything that is surprising or particularly engaging.
I will also look for emotional peaks. These are moments where you notice moments when the interviewee seemed particularly emotional, passionate, or reflective. These moments can serve as emotional anchors for the filmed interview. Pay attention to what the interviewee considers important in their story. Understanding what matters most to them will help guide deeper questions.
4. Categorize the Information. Once you have captured all the key points from the interview, I will then organize the content. I tend to cut out all highlighted sections and organize by themes and topics of interest to follow up on later during the primary video interview.
5. Create a Shooting Script. After organizing the content, I will then move onto creating a shooting script. Creating a shooting script ensures everyone is on the same page prior to shooting. One thing to note about shooting scripts is that it is a starting point, knowing the final answers will vary but the goal is to outline a potential story arc to aim for. It is not uncommon to see this script change dramatically if a new angle presents itself during production. This shooting script is simply meant as a starting point for your project. I will start to craft scenes around this interview content, which will help when starting to develop your shooting schedule.
6. Break Down Your Shooting Script. Shooting script breakdowns are used to ensure you capture everything you need for your project and allows you to schedule accordingly. It organizes all the elements needed for filming, including scene descriptions, shot types, location details and more. It also covers technical aspects like lighting, sound, equipment, and any special considerations for the shoot.
7. Develop Your Questions Based on Your Shooting Script. Based on your shooting script that is built from your pre-interview, design more focused questions that dive deeper into the key themes and emotional moments identified. If there were moments of ambiguity or if the interviewee hinted at something important without fully exploring it, prepare questions to dig deeper into those areas.
Tip #4: Ensure the Interviewee has a clear understanding of what to expect from the filming experience. Involve them in the process.
For me, this is a huge one as it ensures the process is as collaborative as possible. This is so critical because if you are not aligned on expectations, issues could arise later. I remember one experience when I wasn’t explicitly clear on what the deliverable was going to be and in turn, there was a moment where I was unsure that I would be able to release the film. This was a big learning experience for me.

This collaboration also improves the quality of the interview, as the interviewee feels more invested and may offer fresh perspectives.
Additionally, understanding the technical aspects increases cooperation during filming, while clear communication helps mitigate potential conflicts by ensuring the interviewee feels heard and respected.
Tip #5: Prepare Open-Ended, Probing Questions.
Use questions that encourage reflection, storytelling, and elaboration. Include follow-ups like, “Can you walk me through that moment?” to help the interviewee explore their thoughts in depth.
Don’t be overly rigid with your question list—let the interview take its own course. Sometimes, the best insights come from unexpected turns in the conversation. Follow the energy of the interviewee, and remain flexible.
Practice active listening by maintaining eye contact, nodding, and offering verbal encouragement. When the interviewee shares something compelling, ask probing follow-up questions to dive deeper into their emotions or experiences.
Tip #6: Conduct a Pre-Interview Visual Tour.
Ask the interviewee to give you a tour of their personal space, whether it’s their home, office, or another significant location before the formal interview. As they move through familiar spaces, they may start opening up more naturally.
This technique relaxes the interviewee, making them feel more in control, and often leads to spontaneous moments and visuals that enrich the storytelling.
Tip #7: Create a Relaxed, Distraction-Free Environment.
Set up in a quiet location with minimal distractions. These days, I’ve leaned into locations where I am able to leverage natural lighting as I want to ensure a more intimate experience.
For deeper or more emotional interviews, the interviewee needs to feel safe and secure. A calm environment helps create this emotional space, encouraging them to open up about personal or sensitive topics without feeling overwhelmed or uncomfortable.
Before the interview starts, I also let the interviewee know that I may interrupt them during the conversation and it isn’t because they are giving a bad answer - it is to dig deeper into specific parts of their responses.
Tip #8: Start with Casual Conversation First - “The Warm-Up”.
Start the interview with a casual conversation that’s off-camera or before the official recording begins. This “emotional warm-up” eases the interviewee into a relaxed state, allowing their guard to come down. When the actual interview starts, they’re already more comfortable and open, resulting in more natural and honest responses.
Many people are nervous at the start of an interview. Easing into the formal interview helps break that nervousness.
Tip #9: Start the Interview with Emotionally Safe Questions.
When dealing with vulnerable conversations, it is best to start with lighter questions to build trust and rapport. This content would be the structural elements that tie the story together - the fact based content that set the stage for the content for the deeper and transformational events in their lives. As the interview progresses, gradually move toward more personal or challenging topics. This progression allows the interviewee to feel more comfortable by the time you reach these sensitive questions.
Tip #10: Follow the Natural Flow of Conversation. Active Listening and Probing for Depth.
Of all the tips. this one is fundamental to the success of your interview. It is great to have a list of questions to fall back on but always follow the natural flow of the conversation. The person you are interviewing should guide the conversation and you should allow them to take you where they want to go as they will generally answer all the questions you have but in the order that works best for the conversation.
There may be times they go ‘off-topic’ and you may need to redirect but I will tend to let the interviewee be the guide. They usually have something they want to get off their chest and it is important to give them the space they need.
Tip #11: Explore Contrasts in the Interview.
Ask the interviewee to reflect on contrasts within their story, such as “How did you feel at the beginning of this journey compared to now?” or “How has this changed you over time?” These reflective questions encourage the subject to think deeply about growth, change, and personal evolution. I’ve found these questions to solicit the best answers that almost always make the final edit.
Contrasts can evoke emotional or powerful responses by making the subject reflect on their personal journey and transformations.
Tip #12: Use Nonverbal Affirmation & Mirror Body Language.
Instead of always responding verbally, use nonverbal affirmations like nodding, smiling, or maintaining eye contact to encourage the interviewee to continue speaking. This keeps the flow of conversation natural without constant interruptions.
It allows the interviewee to expand on their thoughts without the disruption of verbal acknowledgments, leading to more in-depth and uninterrupted answers.
Tied to the previous point, subtly mirror the body language of the interviewee during the conversation also helps. If they lean forward, you lean forward slightly. If they relax back in their chair, you do the same. This creates a subconscious rapport.
From what I have seen and heard, people tend to feel more connected and open when their body language is mirrored, leading to more relaxed and open conversations.
Tip #13: Utilize Silence*.
This was a hard one for me to get when I first started interviewing. We are so used to filling the air to avoid silence that we miss some of the best parts of a conversation.
After the interviewee answers a question, resist the urge to jump in immediately with the next question. Instead, let a moment of silence linger. This often encourages the interviewee to elaborate on their response, providing deeper insights or clarifications. Many times, they will repeat what they just said in a cleaner way.
Silence can be uncomfortable, prompting people to fill the gap with further thoughts, often leading to unexpected revelations or emotional depth. Make sure you aren’t the person filling that air!
* Potentially the most important of all tips IMO.
Tip #14: Echo and Reframing Technique.
When the interviewee makes an important statement, briefly repeat or paraphrase what they said before moving on. For example, if they say, “I was scared of losing everything,” you might say, “So you were afraid of losing everything…” and pause. This technique makes the interviewee feel heard and can prompt them to elaborate further. It comes across as if the point ‘struck a cord’ and that you want to know more.
Tip #15: Ask the Same Question Twice.
Another very powerful tactic is to ask a question twice and there are two ways to do this.
If the answer they provided was ‘close’ but not perfect, ask it in a different way. For example, ask, “How did you feel at that moment?” then later reframe it as, “What was running through your mind during that time?” The different phrasing often brings out new layers of responses.
Flag the question and come back to it later in the conversation. Let them know you’ve already asked the question but that you come back to it and dig deeper.
Rephrasing a question or asking the question later in the conversation often helps the interviewee think about it from a fresh perspective, revealing deeper or more nuanced thoughts.
Tip #16: The Delayed Cut.
After the formal interview is “over,” don’t immediately stop filming or pack up equipment. Often, once the subject believes the interview is done, they relax and open up with more candid thoughts or anecdotes. This can lead to moments of profound authenticity.
Interviewees often reveal personal or deeper reflections after the pressure of the “official” interview is lifted.
Tip #17: Open up Questions to Your Crew and then Subject.
Once you are done asking your questions, open it up to your crew. Ask your crew, “Do you have anything to add?” Some of the best follow ups come from crew!
Following this, I then open up to the interviewee, “Is there anything you want to add?” This question usually solicits a ‘final thought’ from the subject.
Tip #18: Get the Ending Again if Needed.
There will be many times when an interviewee will get 99% there with an answer but not land the ending. Instead of getting them to repeat the whole answer, help them come up with an ending and focus on getting those lines after.
Let’s say you’re interviewing someone about a pivotal moment in their life, and they’ve shared a powerful story but didn’t quite nail the closing. For instance, they might say:
“That’s when I realized everything had to ….. had to uuum, …. change.”
While this is close, it is really tough to use in the edit, unless covered with supporting footage / broll. For me, I may want to see this line on camera as it is an inflection point.
Instead of having them repeat the whole story, you could gently guide them to repeat just that last line.
“That’s when I realized everything had to change.”
Tip #19: Utilize Verité Sound-Ups.
As I have grown with my storytelling, verité sound-ups have started to play a bigger role in my approach.
After the initial interview, I capture verité-style sound-ups (unscripted dialogue in a natural setting) to provide spontaneous, authentic reactions or insights.

These simple verité moments can reveal hidden layers of the subject’s personality and add depth to your story. You can also use this opportunity to ask a question in a different way or as a safety and ask follow up questions.
I don’t know how many times I have had a situation where the interviewee wish they would have dug deeper or had more thoughts after about a specific part of the interview that stuck with them. Having this additional opportunity to deepen your story is an extra tool you can leverage.
Tip #20: Use a “Walk-and-Talk” Interview.
Instead of a static, seated interview, have the interviewee walk through a significant location while answering your questions. The movement and environment add energy to the conversation and can evoke different thoughts or perspectives compared to a seated interview.
Movement can lower tension and stimulate more natural responses, as the interviewee feels less constrained by the interview setting.
Tip #21: Do Not Ask for the Interviewee to Repeat the Question in Their Answer.
A very controversial one I am sure!
As I’ve dove deeper into this space, my pet peeve is when an interviewee is asked to repeat the question in the answer. This technique has been critical for so long as it is normal for people to provide ‘answers without context’.
However, as I have went deeper into the process of interviewing and then editing, it is rare you are unable to wrap the context around an answer in the edit. The issue only appears if you don’t ask the right questions to fill in the missing parts. If you feel context is missing, ask a follow up question to fill in your missing parts.
The second reason is the idea of show don’t tell. The second you have the subject repeat the question, you are painting yourself in the corner. To me, it comes across as a very surface level predictable edit.
HERE IS WHY: When an interviewee is asked to rephrase the question in the answer, you are then transforming your authentic moments into corporate sound-bites that feel forced, predictable and inauthentic. I just don’t buy these answers!
Bonus Tip: Edit your Own Interviews.
Most of my learnings have come the fact I edit all of my videos. I know I am not the best editor in the world but I have grown the most in this space. I remember when I was unable to edit my own videos as I didn’t know how to effectively pull together a story arc from an interview. It was a stress point for me.
Editing my own video interviews has helped improve the interviewing process by giving me a deeper understanding of how to structure conversations and specifically when to dig deeper.
As you edit, you can see which questions led to compelling answers and which didn’t, allowing you to refine your approach for future interviews. It can help show you what techniques worked well and which didn’t.